Setup heart beat monitor
How to setup and run the monitor process

1. Generate two magic numbers to access the application from another process (monitor) without using user:password.
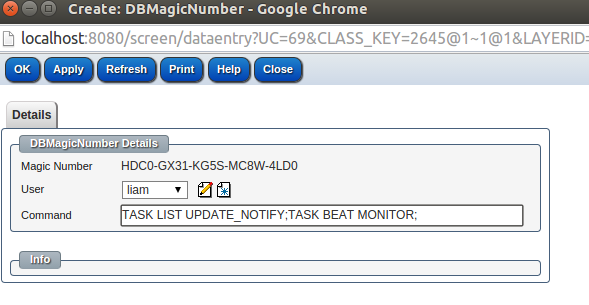
Go to 'Customize > Classes' and search for the class DBMagicNumber and click on create DBMagicNumber
Set the command to: TASK LIST UPDATE_NOTIFY;TASK BEAT MONITOR;
Save and copy the generated key from the field 'Magic Number' .
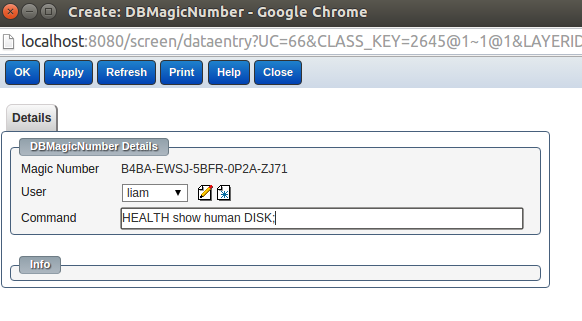
Create a second magic number and set the command to: HEALTH show human DISK;
Save and copy the generated key from the field 'Magic Number' .


Note: Only user with owner access level allowed to generate magic number
2. Disable unused tasks
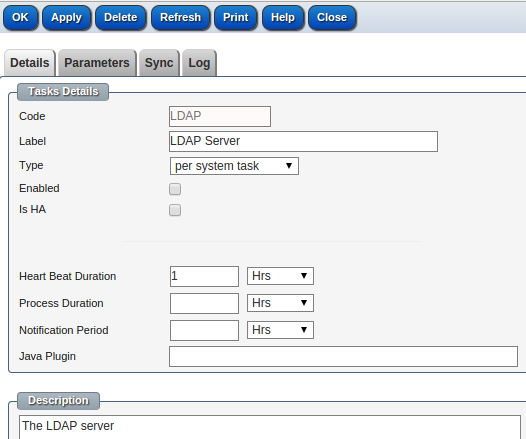
Go to 'Customize > Classes' and search for the class DBTask
List all tasks and clear the enabled field from unused tasks like:
LDAP, BACKUP, MAIL_SCANNER, FILE_SCAN

3. Update the file monitor.properties
Connect to your application server and go to the configuration directory
cd stServer/conf
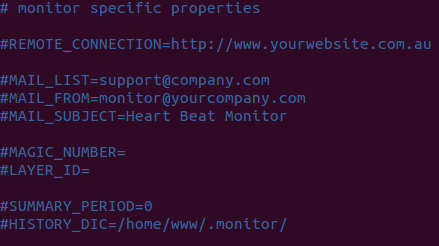
Edit the file 'monitor.properties' with your favourite editor.
vi monitor.properties
Remove the comment sign (#) from the keys and set the below values:-
  REMOTE_CONNECTION= Put here your application URL, for example https://aspc.jobtrack.com.au
  MAIL_LIST=support@yourcompany.com
  MAGIC_NUMBER= Put here the magic numbers you generate before separated by comma, for example HDC0-GX31-KG5S-MC8W-4LD0,B4BA-EWSJ-5BFR-0P2A-ZJ71
  LAYER_ID=1251 (Your application layer id)
  MAIL_FROM=monitor@yourcompany.com
  MAIL_SUBJECT=Heart Beat Monitor
  #send a summary email every 7 days, set to 0 will disable the summary email
  SUMMARY_PERIOD=7 Days
  #monitor history location, the history is used for sending summary email
  HISTORY_DIC=/home/www/.monitor/

4. Create a schedule task to run the monitor every 10 minutes as below.
(For Linux server use crontab)
$sudo su - webapps
$crontab -e
Add the below line to the file and save.
00,10,20,30,40,50 * * * * /home/webapps/stServer/bin/monitor.sh > /home/webapps/stServer/logs/monitor.out 2>&1